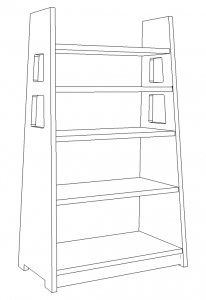
House listings share with résumés an attempt to put the best light on the subject, and when writing either, it is easy to slip from positive spin to exaggeration, and to outright lying. The listing for our house claimed a recently updated kitchen, but “recently updated” here turned out to be some newish paint, a sheet vinyl floor less than a decade old, and new knobs on the cabinet doors. About the only thing that could be said for the kitchen when we first looked at the house in 2007 was that it didn’t feature cherry cabinets, granite counters, and stainless steel appliances. That particular look palled quickly as we scanned listing after listing and saw that 95% of all updated kitchens featured cherry and granite. By comparison, the gray walls, laminate countertops, and out-of-scale beige wall tiles were less than inspiring, certainly, but not a deal breaker. We could live with it for a time while we tackled more urgent projects–painting over the garish, glaring “designer colors” elsewhere in the house. And at least we wouldn’t have to feel bad about replacing a new kitchen.
Kitchen Inspiration
Sorting some unfiled photos and found the following from Bungalow Kitchens. It was one of the primary inputs as we considered options for updating our neglected kitchen. We especially liked the painted cabinets, nickel hardware, use of glass in the upper cabinet doors, and the wooden counter top. The cabinet latches are unduly bulky, though, and we prefer inset hinges to the surface mounted ones used here.
Milk Paint
Milk paint sparks images of shaker oval baskets stacked in muted columns, but there’s more to its charm than vintage appeal. While opaque, it won’t hide the grain of your wood. It’s also relatively durable, although it will spot when exposed to water, and its appearance seems to improve with use, any dings adding a patina of venerability to a project.
Aritcles in Fine Woodworking and Popular Woodworking recommend the use of a natural bristle brush, but you can use a foam roller to apply. I use Old Fashioned Milk Paint, mixing equal parts water and powdered paint to produce only as much as I’ll use in a day or two at the most–let it sit longer and it will go bad–and roll it on without first wetting my projects to raise the grain. After a couple of coats, I’ll hand sand with 220 grit to knock down any raised grain, then apply another coat or two until I get the depth I want.
Milk paint dries flat and chalky. To bring out a little luster and even out the color, I apply a coat of boiled linseed oil and burnish with fine steel wool. The oil will darken the color, sometimes substantially, so to preserve the original hue while adding protection, topcoat with water-based polyurethane. Oil based poly will add a yellow color cast.
Trestle Table–Construction
Using wide boards minimized glue up, but it also required flattening them by hand. Fortunately
they were in good shape and were ready for glue before too long. While the top dried, I turned my attention to the trestle ends. I began by shaping the patterns for the feet and caps of the trestle ends. Before shaping those parts, though, I cut the mortises for the through tenons using a guide bushing and pattern. I had originally planned on using sliding dovetails to attach the top to the base, but after a couple of disastrous attempts to rout the dovetails, I decided to use screws instead.
The end posts were tenoned and mortised before shaping as well. With the curved tapers cut and smoothed, the ends were ready for glue. With the tenons wedged tight and glue drying I could return my attention to the top. Gently curves add some subtle visual interest to the top. I roguhed these out with a jigsaw, then planed them smooth, but it would have been easier to simply plane the curves on the long edges. As it was, the jig saw wandered a bit in the cut, and I had to use a chamfer along the bottom edge instead of a roundover on the the top and bottom edges.
The stretcher proved too long to tenon on the table saw, so I cut close on the bandsaw and fine tuned the fit by hand. Cutting the angled mortises for the wedges was probably the most difficult aspect of construction, but the wedges add a nice detail as well as allowing the base to be knocked down for transport. I cut the wedges on the bandsaw and fit each one to its mortise, then sanded all parts through 220 grit before applying several coats of orange shellac. Since a dining table is likely to see some abuse as well as exposure to water and alcohol, I topcoated the shellac with polyurethane.
In retrospect, I’m sorry I couldn’t get those sliding dovetails cut. They’re a more elegant solution to attaching the top to the base than screws. And while the shellac warmed the soft maple nicely, I’m curious to see what a little dye in the mix would have yielded.
Trestle Table–Design
I’ve wanted to build a trestle table for some time–the economy of materials and ability to radically alter a design by modifying a few details make it an interesting project–but I didn’t need a new dining table, so I didn’t pursue the project. When some friends moved into a their new house and needed a new table, I jumped at the chance to build a piece.
While I had free reign over the design, I wanted to build something that would make them both happy, a slight challenge since his taste tends to Danish modern and hers to traditional. Checking my library showed a surprising amount of variation in design. Changes to the trestle ends, position of the beam, and slight alterations to the top can make the piece medieval, Shaker, or modern. In the end, I opted to modify a design by Gary Rogowski. The updated Arts & Crafts look would strike a balance between tastes. I preserved the slight curves to the top and the keyed through mortise on the beam, then altered the length and width of the design and changed the shape of the trestle slightly, opting for concave curves in the tapered post and feet. Width and length of the top were determined by the boards available for the top. Final dimensions were 29″ h x 29.5″ w x 78″ l.
More Information
- Gary Rogowski’s original design from Fine Woodworking #214
- Kenneth Rower has a very useful article on trestle table design in Fine Woodworking #42.
Basic Electrical Kit

Clockwise from upper left: Cable stripper, current tester, wire caps, wire stripper, headlamp, plug tester, adjustable screwdriver.
I don’t have many specific toolkits, and I certainly don’t move in the lofty organizational circles of people posting in the systainer section of the Festool Owner’s Group, but I do have a basic kit for electrical work around the house that lives in its own canvas bag. It’s very convenient to pull the bag out when I have a quick job like switching out lights.
The basic kit includes wire cutters/strippers, a current tester, three-prong outlet tester, wire caps, adjustable screwdriver, and needlenose pliers. For more ambitious work like new circuits or outlets, the kit gets supplemented (metal fish tape, fiberglass fishing rods, a key hole saw, drill bit extensions, etc.), but the basic kit covers a lot of ground and isn’t so expensive that I have money tied up in something that doesn’t get used often.
Vintage Hall Light
We managed a quick getaway to Fed-On Lights in Saugerties, NY while we were upstate over the holidays where we picked up a new light to replace the generically “period” lamp from Lowe’s I’d installed shortly after we moved in. Installation was complicated by an unusually sized base and an adapter bar that didn’t fit the base. A little modification of the bar and some angled screws and I was able to get it in using my basic electrical kit.
More Information
We keep buying lamps and fixtures before I can build some, but some day I’d like to take a crack using the plans in John D. Adams’ How to Make Mission Style Lamps and Shades and Wood Magazine’s Arts and Crafts Furniture as a starting point.
Magazine Stand–Construction
When the time came to replace the utilitarian shelves in my office, I knew I wanted something in the Arts & Crafts style, but the sloping ceiling and short knee walls create some design constraints, and I needed a design that lent itself to production techniques. After checking my library for options, I decided one variation or another of the magazine stand would match my design and construction requirements.
Initially drawn to the trapezoidal forms produced by the Charles Limbert Company, I prototyped a couple. While they add some visual interest, the tapering sides required cutting three different shelves for each stand, complicating construction. After some experimentation, I settled on a modified version of Stickley’s No. 79. This iteration of the form features rectangular sides softened by radiused corners on the top edge, a half-moon cutout to form the handle, and an arch on the bottom edge. A router template would make reproducing the sides relatively easy, and the straight edges of the sides meant that I could cut the shelves without having to change any tool setups.
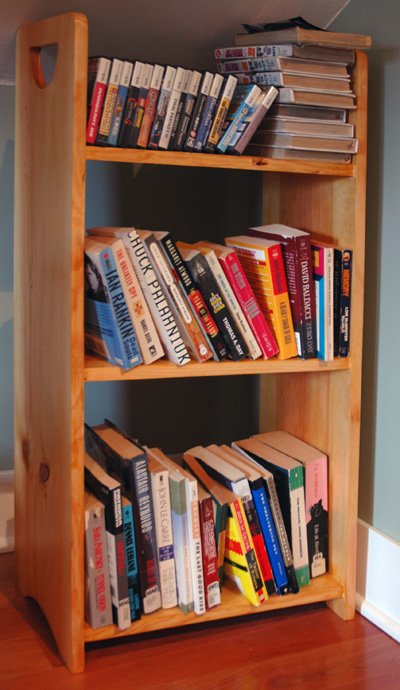
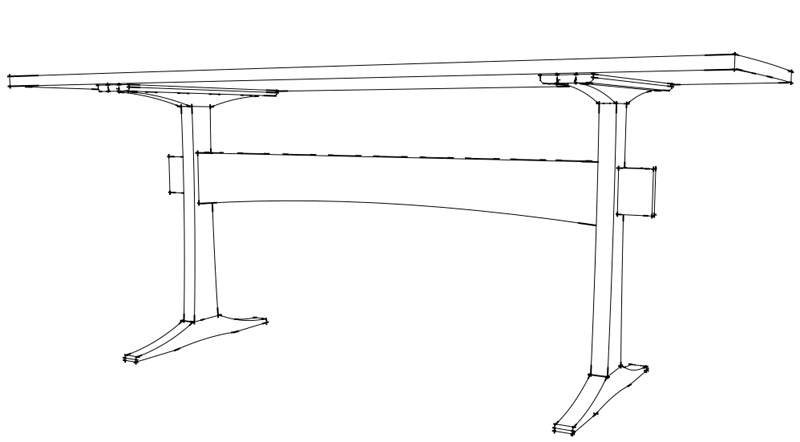
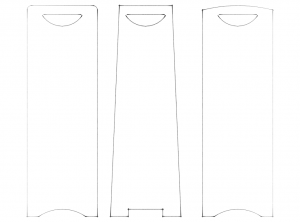
I modified the design to better fit the space and my requirements. I reduced the height from 40
inches to 36, lowered the bottom shelf to increase storage capacity, and increased the radius on the top corners. I also added a couple of inches to the width of the shelves and eliminated the toekick. With the design finalized, I prepared a full-sized router template in 3/4″ plywood.
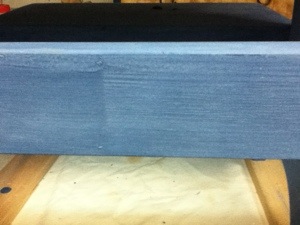
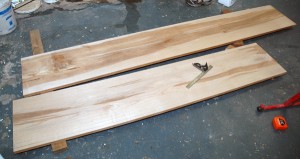
Since I had a lot of shelves to build, I chose #3 pine. It’s readily available in wide boards and economical. The blanks were cut to slightly oversized on the tablesaw, then attached to the template. Had I been placing all the shelves in the same position for each stand, I could have screwed the template into each side so that the shelves would have hidden those screw holes. But I needed to be able to adjust the height of the shelves, so I used double-sided tape to attach the template to the blanks, then roughed out the shape of sides using the jigsaw and trimmed to final dimensions with a flush-cutting bit in the router.
When I can, I like to pre-finish my projects before assembly. It can increase the time spent on finishing, but it simplifies the process. After sanding through 220 grit, I wiped on three or four coats of amber shellac. Once the shellac was dry, I wet sanded with 400 grit. Joinery is simple: two pocket hole screws in the end of each shelf join the stand together.
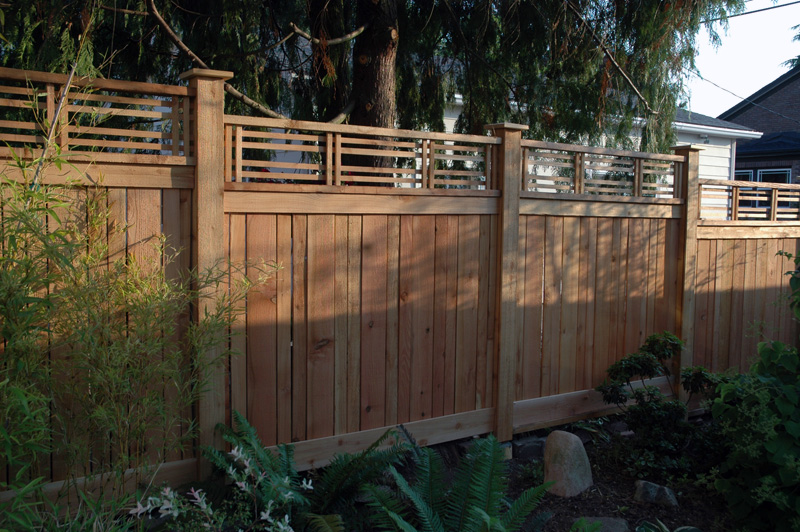
Magazine Stand–Background

The cutouts and sloping sides of Limbert’s No. 346 Magazine stand distinguish it from more pedestrian offerings from other makers.
The Morris Chair is often regarded as the epitome of Arts & Crafts furniture, but the same argument can be made for the lowly magazine stand. These small shelves featured in the catalogs of most manufacturers and their low prices made them an easily attainable item for households that otherwise might not have been able to afford a piece of Arts & Crafts furniture. The same traits that made them economical for makers to produce also makes them a relatively easy to recreate in the home shop &mdash they use minimal material and simple joinery.
At their most basic, the stands are two sides linked by shelves (usually three or four), often with some kind of toe kick. Variation in the shape of the sides, orientation of the shelves and sides, and how the shelves joined the sides produced a surprising number of variations on the basic theme. Plugged screws, pocket hole screws, dadoes, or tenons can join the shelves to the sides. Using screws or keyed tenons allows the stand to be broken down for storage or transport.
Altering the shape of the sides transforms the character of the shelf. Gustav Stickley’s No. 79 features rectangular sides with a rounded corners at the top. Charles Limbert’s catalogues
featured several versions with trapezoidal sides. Limbert’s No. 346 takes the trapezoidal form further, tapering from top to bottom on the sides and faces.
More Information
Popular Woodworking offers a free plan of a simplified version of Stickley’s No. 79.
Gary Rogowski’s “Classic Craftsman Bookcase” (Fine Woodworking No. 136) details construction of a stand with keyed through tenons.
Fence–Construction

One of the side sections. Deciding how and where to adjust the fence to meet the slope of the yard required quite a bit of head scratching.
To keep fence construction manageable we tackled the three sections (two sides and back) one at a time. Construction began with a materials list–gravel, concrete, pressure treated posts, cedar, and stainless steel screws–and a trip to Mill Outlet Lumber. Then it was time for demolition. Taking a chain link fence down is relatively easy, but posts set in concrete are another matter. If the posts weren’t located where new posts would go in, I cut the posts off with a reciprocating saw where they met concrete. Digging out the posts that had to go was less pleasant.
There’s a surprising amount of debate online about whether posts should be set in concrete or alternating levels of dirt and gravel. I opted for a base of about 6 inches of gravel in a thirty inch posthole, then concrete. To avoid showing the perforated faces of the pressure treated posts, they were wrapped in cedar once the concrete had set. To avoid visible fasteners, I screwed the fence rails to the posts using pocket holes drilled with a Kreg jig. With the rails in place, the infill went in fairly quickly.
In another departure from the source design, only a few sections were topped with the gable roof. To produce the gable, two boards were butted together at a 90 degree angle and screwed together. Other posts were capped with a simple 7″ x 7″ beveled cap. I ripped a 2″ x 8″ to width, then cut it into squares. The bevel was cut on the table saw with the blade set to about 7 degrees. After sanding, the caps were fastened to the posts using silicon caulk.