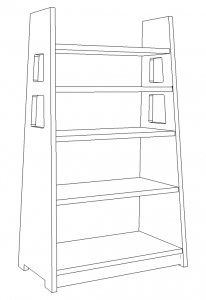
The cutouts and sloping sides of Limbert’s No. 346 Magazine stand distinguish it from more pedestrian offerings from other makers.
The Morris Chair is often regarded as the epitome of Arts & Crafts furniture, but the same argument can be made for the lowly magazine stand. These small shelves featured in the catalogs of most manufacturers and their low prices made them an easily attainable item for households that otherwise might not have been able to afford a piece of Arts & Crafts furniture. The same traits that made them economical for makers to produce also makes them a relatively easy to recreate in the home shop &mdash they use minimal material and simple joinery.
At their most basic, the stands are two sides linked by shelves (usually three or four), often with some kind of toe kick. Variation in the shape of the sides, orientation of the shelves and sides, and how the shelves joined the sides produced a surprising number of variations on the basic theme. Plugged screws, pocket hole screws, dadoes, or tenons can join the shelves to the sides. Using screws or keyed tenons allows the stand to be broken down for storage or transport.
Altering the shape of the sides transforms the character of the shelf. Gustav Stickley’s No. 79 features rectangular sides with a rounded corners at the top. Charles Limbert’s catalogues
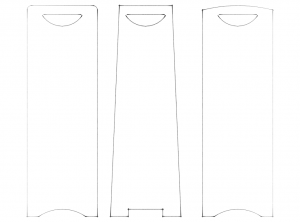
Change the shape of the side and transform the character of the stand.
featured several versions with trapezoidal sides. Limbert’s No. 346 takes the trapezoidal form further, tapering from top to bottom on the sides and faces.
More Information
Popular Woodworking offers a free plan of a simplified version of Stickley’s No. 79.
Gary Rogowski’s “Classic Craftsman Bookcase” (Fine Woodworking No. 136) details construction of a stand with keyed through tenons.