Tag Archives: porch

Timber Frame Porch–Purlins

purlins

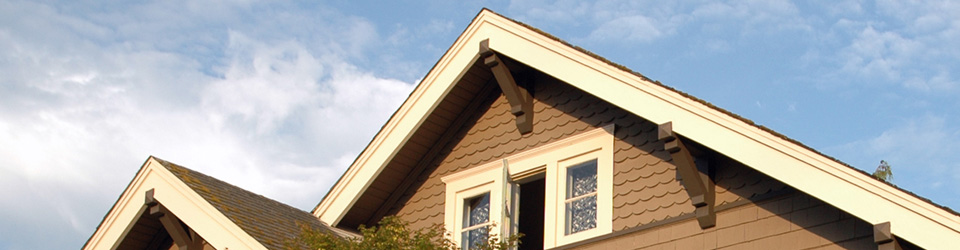
Half-lapped purlins create another layer of visual interest while supporting the roof panels.

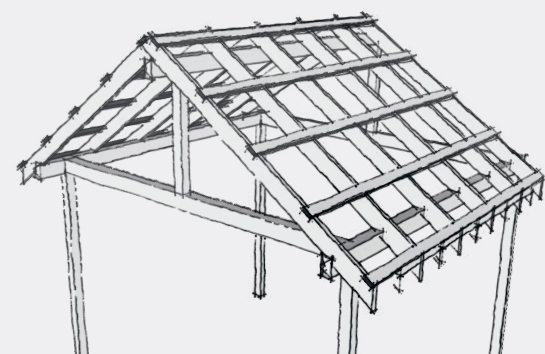
The roofing panels I selected required purlins 24 inches on center to prevent sag. Initially, I’d considered installing blocking between the rafters, but after reviewing timber frame images with purlins that ran over the rafters, I drew versions with blocking and overlaid purlins and decided half-lapped purlins looked better than blocking or a simple overlay.

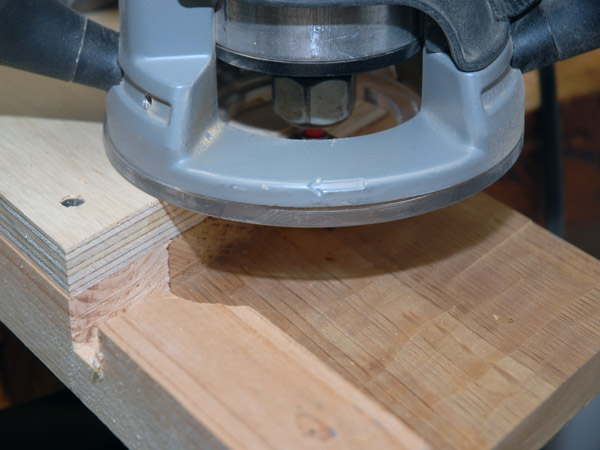
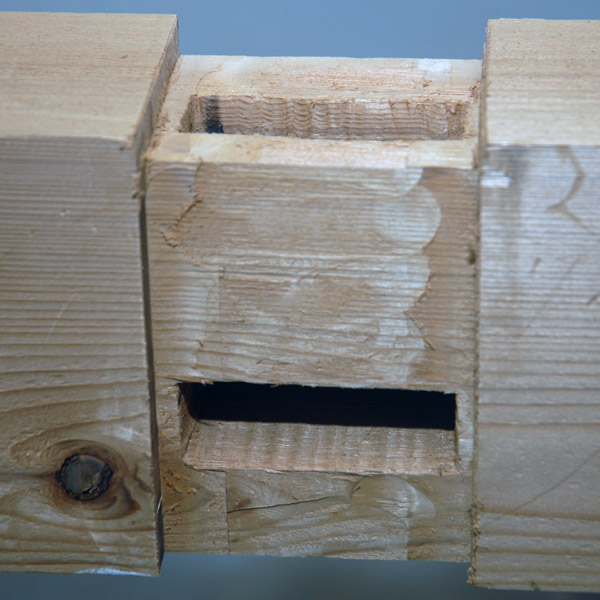
To cut the half laps, I laid out the joints on 2 x 6 stock and used a straight bit in the router guided by a dado jig to notch the stock. After cutting the joints, I ripped the 2 x 6 stock into 2.5 inch strips and rounded over the cut edges with a 1/8″ roundover bit.

After the joinery, installation was easy. The first purlin was set in place at the end of each rafter and screwed into place at every joint. I then used spacer blocks to position the next purlin and fastened it in place. Repeat ten more times, and the porch was ready for a roof.

Timber Frame Porch–Ridge Beam and Rafters

half lap jig

The angled fence guides a top-mounted bearing in a flush cut bit and a stop positions the fence at the correct location for the half lap.

I debated whether to include a ridge beam in the  porch design since it would reiterate the three-beam look of the house’s fascia, and the fact that it would simplify installing rafters finally persuaded me. The joinery was identical to the other beams: an end bevelled on the miter saw and two housed mortises cut with a router and jig. I pinned the half posts into the ridge beam and hauled the whole unwieldy assembly up a ladder and dropped it into place. With the base complete, I was ready to move on to rafters.  Continue reading

Timber Frame Porch–Base Assembly

After pinning the post tenon, the peg is sawn flush to beam.

After pinning the post tenon, the peg is sawn flush to beam.

White oak has a pleasant, nutty scent, a fact of which I was reminded as I sawed the pegs flush to the beams during the last part of base assembly on a surprisingly sunny November day. Assembly began with a final test fit of each tenon into its respective mortise. Once they fit smoothly, I drilled the beams for the pins, and marked the tenons for the offset holes required for drawboring the joint. The offset helps to pull the joint tight and to keep it tight even if wood shrinkage tends to pull it apart.

Continue reading

Tree Nail

A V-groove hold the blank in position. The rough circle shows the finished outline of the peg.

A V-groove hold the blank in position. The rough circle shows the finished outline of the peg.

The tree nail, or trunnel, is a wooden peg used to pin the tenons of a timber frame to their mortises. Commercially available pegs are turned on a lathe, but traditionally they are shaped from rived wood, often using a draw knife to round the wood while it’s secured in a shaving horse. Riving, or splitting peg blanks instead of sawing them, ensures the grain of the wood runs continuously through their entire length and minimizes the risk of the peg splitting when it is hammered home. Since timber frame joints are usually drawbored–the hole in the tenon is offset slightly from the hole in the mortise walls–the continuous grain of a rived peg is especially desirable. Continue reading

Cutting tenons for a Timber Frame

After defining the tenon shoulders with a handsaw, I cut the cheeks on the bandsaw, then tuned with rasp and chisel to fit.

After defining the tenon shoulders with a handsaw, I cut the cheeks on the bandsaw, then tuned with rasp and chisel to fit.

A survey of resource suggested the following considerations for sizing the tenons used in timber frame construction:

  • The thickness of the tenon is usually one-quarter the width of the timber but no more than one-third. 
  • The tenon usually runs the whole width of the member being tenoned.
  • The walls of the mortise should be at least the thickness of the tenon.

Since I was working with 4 x 4 and 4 x 6 stock, I made my tenons an inch thick and two inches deep. And since I think a little shoulder is a good thing, I reduced the width of the tenon by a half inch to leave a quarter-inch shoulder on the sides of the tenons. Continue reading

Timber Frame Mortise

Two housed mortises scaled for a timber frame

These two housed mortise were cut with a router using jigs and template bushing to guide the router.

I had admired the timber frame construction I saw on display in the temples of Kyoto and Himeji castle, so the decision to use those techniques when building the new porch was an easy one. Too, I figured, timber framing shouldn’t be too different from furniture making–simply scale up the joinery. A little reading (the timber framing section of the Forestry Forum and the Fine Homebuilding archive) suggested the theory was might be sound, but the practice of scaling required a whole different set of techniques and tools. Continue reading

The Once and Future Patio

porchThumbnail While the old porch was serviceable, it had been built for functionality, not form. The roofline was sloped to shed water, but the one-way slope contrasted harshly with the roofline of the garage. Nor did the algae covered fiberglass panels and peeling paint contribute to the effect. Still it kept the table dry and provided a convenient place for ammonia fuming, so we tolerated it. Since the patio was being replaced, it seemed reasonable to replace the porch as well. Continue reading