
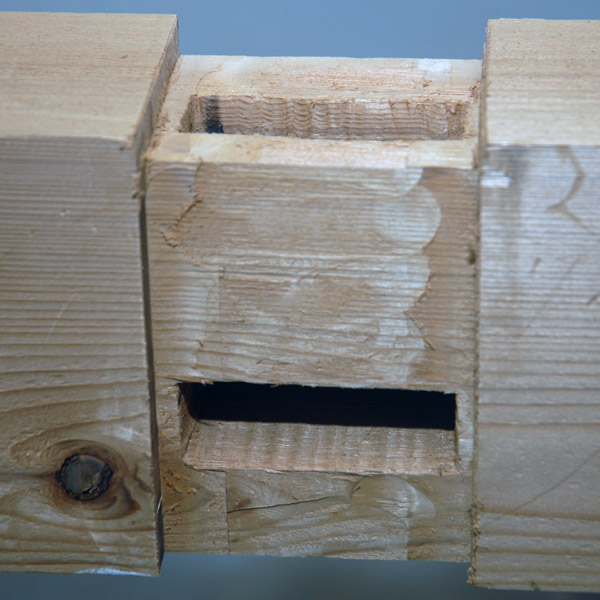
These two housed mortise were cut with a router using jigs and template bushing to guide the router.
I had admired the timber frame construction I saw on display in the temples of Kyoto and Himeji castle, so the decision to use those techniques when building the new porch was an easy one. Too, I figured, timber framing shouldn’t be too different from furniture making–simply scale up the joinery. A little reading (the timber framing section of the Forestry Forum and the Fine Homebuilding archive) suggested the theory was might be sound, but the practice of scaling required a whole different set of techniques and tools.
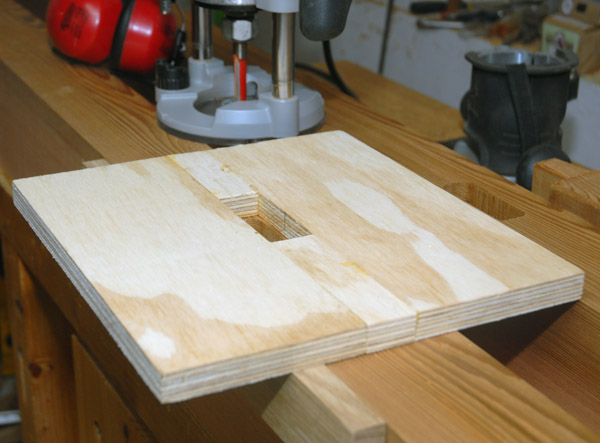
The opening of the jig is sized to the mortise.
I squelched the wave of despair brought about by the perceived need for a chain mortisers, slicks, and come-alongs, then re-evaluated. I’d chosen to use cedar in 4×4 and 4×6 sizes. The cedar is naturally water-resistant, relatively easy to work, and light, and the scale of the project meant I didn’t need larger timbers. Since I was working with 4x4s and 4x6s, I didn’t need to worry about square rule joiner or specialized tools.
To rough out the mortises, I chose to use a simple jig to capture a bushing and guide the long 1/2″ straight bit I’d acquired to build the gates for my new fence. The opening of the jig is sized to the mortise and the offset of the bushing. To create the opening, I ripped a strip of 3/4″ plywood to the final width of the opening, then glued a long piece to either size. After the glue dried, I screwed a piece of scrap to make the fence, positioning it so the opening would be centered on the narrow faces of my 4×6 beams.

Some quick chisel work squares the mortise and clears the lip created by the bushing.
After marking the positions for the mortise, I clamped the jig in place and routed the mortise, first making a series of plunges straight down (pausing occasionally to vacuum the cut lean), then moving the router along the template edges to cut the mortise to final shape. Since the thickness of my jig and length of my bit mean I was about 1/4″ shy of my final depth, I had to remove the jig and rout again, this time using the edges of the mortise to guide the bushing. This creates a lip around the bottom of the mortise, but since I was already squaring the rounded corners of the mortise it didn’t take much extra time to chisel the lip away.
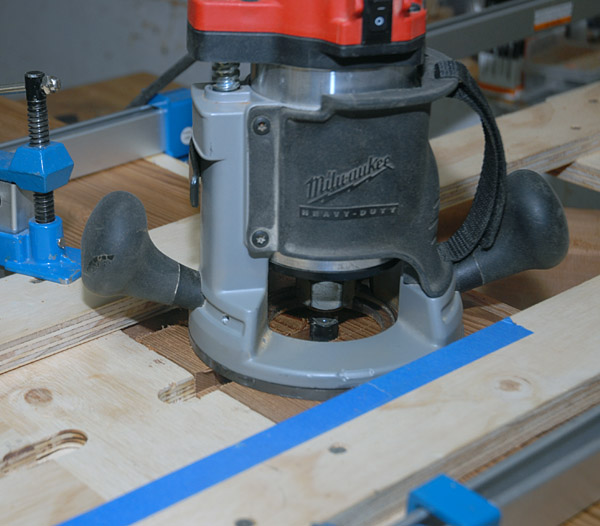
A dado jig guides the router for the cuts that define either end of the housing.
Housed mortises are often used in timber frame construction since the extra bearing surface makes for a substantially stronger joint. I took that approach here, but instead of creating a sloped cut that tapered from the base of the housing out to the edge of the board at the top of the joint, I chose to cut a straight housing. Doing so meant I wouldn’t have to bevel the ends of my beams, nor cut the housings by hand. Instead I used a simple dado jig to make the straight cuts on either side of the housing, then routed the waste clear.
Pingback: Timber Frame Rafters | 1910 Craftsman