Tag Archives: 2014

Mid-Century Room Divider–Finished

Mid-Century Modern display case

Call it a room divider or call it a display case, this piece has a delightful asymmetry.

Many dadoes and a few miters later, I finished the Mid-Century room divider. Oil, a few coats of shellac and some paste wax finish things off. Despite a frustrating assembly, the end result is fairly pleasing, and the basic concept–a case captured by two leg assemblies and divided by an asymmetrical grid of dividers–suggests possibilities for variations on the design.

Original Exterior Finish Revealed

stained shingle

Flaking paint revealed the original finish coat for exterior shingles–it looks to be a green stain.

I took advantage of some unseasonably warm (and dry) weather to touch up some exterior paint. As part of my prep, I scraped patches of loose paint, revealing what looks to be the original finish–a green stain. So it looks like the clapboard was painted green and the shingles stained. Not an unusual approach for the period.

Mid-Century Room Divider–Assembly Begins

Mid-Century Room Divider

Dadoes join the shelves and dividers of a Mid-Centruy Modern room divider/shelf by an unknown maker.

After what has been much procrastination and edgebanding of plywood, I’ve finally begun assembly of a Mid-Century Modern shelf. It’s an attractive design with simple joinery (read more about the design here), but there’s a lot of that joinery with eleven shelves to fit in the dividers and case pieces. Too, the design is a bit of a puzzle to assemble: normally I’d glue the case together first, then slide in the dividers and shelves. However, this design is has two show faces, so the dividers and shelves get assembled before being wrapped by the case pieces. I’m putting it together in stages, beginning with the left side and gluing a column of shelves together at a time. We’ll see how it goes.

Carving the Betsy Jack o’ Lantern

betsy jack o' lantern

Betsy, a Curious George character, incarnated in pumpkin.

The question about what skills are transferrable from woodworking comes up on occasion in online discussions. Certainly the ability to measure, mark, and cut to that mark apply to a lot of crafts, and sometimes in unexpected ways. Take pumpkin carving. When asked what kind of jack o’ lantern he wanted, my son Peter replied “Betsy.” Betsy, for the uninitiated, is a character from the animated adaptation of the Curious George books. Peter gets points for originality, but I wasn’t sure I’d be able to deliver.

An image search provided a suitable screen grab of Betsy. To transfer the image, I cut out the face and hair and traced them with a black Sharpie, then punched a toothpick along the details of the face and connected the dots. After clearing out the pumpkin, I drilled out the eyes with an appropriately-sized bit and used a pumkin-carving tool to define Betsy’s eyebrows, nose, and mouth. The hair presented more of a challenge. I first used a V chisel to define the outline of the head and hair, then used a gouge to scrape off the pumpkin’s outer skin within the hair outline. The results at least passed muster with a three-year-old.

Stickley 220–Back from the Upholsterer

Stickley settle

A loveseat variation on L & J.G. Stickley’s No. 220 Prairie Settle

I was skeptical of my own work towards the end of the settle build, but my doubts were alleviated by a trip to our upholsterer. He’d asked us to come into the shop to confirm the final look of the back and side cushions. Even with only the decking and bottom cushions complete at the point, the settle was looking really good. It’s now complete and installed, and we’re enjoying it–especially the dog.

Mid-Century Room Divider–Design

mid-centruy room divider sketch

The asymmetrical grid of this open-backed room divider defines a novel design.

While the open floor plan is not without its appeal, it tends to work better when divided into functional zones. The folding screen, a staple of Arts & Crafts catalogs at the turn of the 20th century, is one way to help define these zones, but an open shelf like this design by an unknown maker accomplishes much the same effect without creating a solid barrier. The asymmetrical grid and single drawer liven the design, while construction is relatively straightforward. The two side frames capture the mitered case while dadoes house the shelves and vertical dividers. Half-blind dovetails join the sides and ends of the drawer box, but simpler joinery would suffice.

Mogensen-inspired Bookcase–Construction

Borge Mogensen inspired bookcase

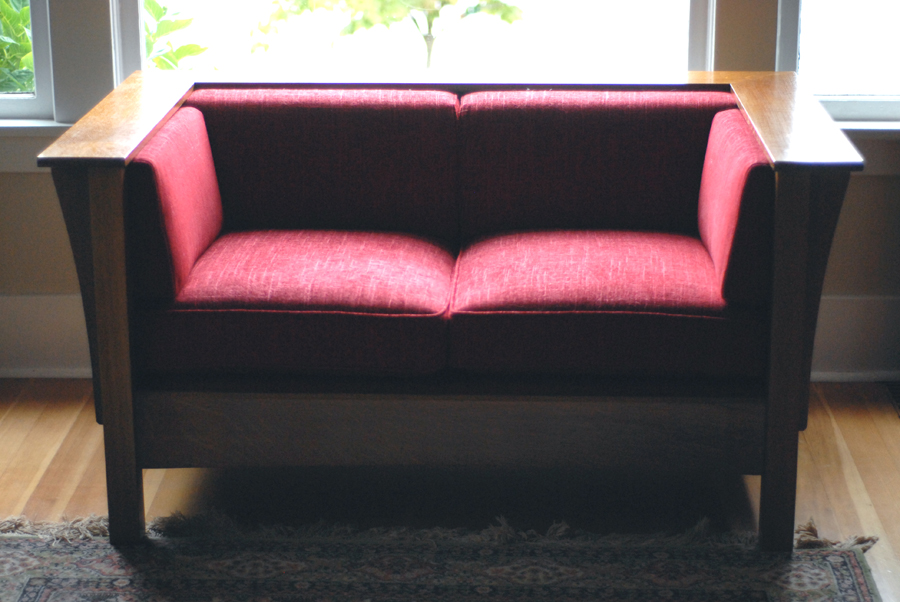
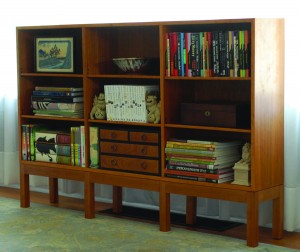
This console variation turns a Mogensen design on its side. See more about the original here.

It’s only after building this variation on a Børge Mogensen design that I fully appreciated the original. Normally I like an apron set back from legs to vary the plane of a base, but here the legs are set flush with the base aprons, and the entire base is flush with sides of the case, presenting what should be a monolith, but the cove along the top of the base interrupts the facade. Too, Mogensen creates variation elsewhere, making the shelves thinner than the case stock and setting the edges of the shelves back from the plane of the case front.

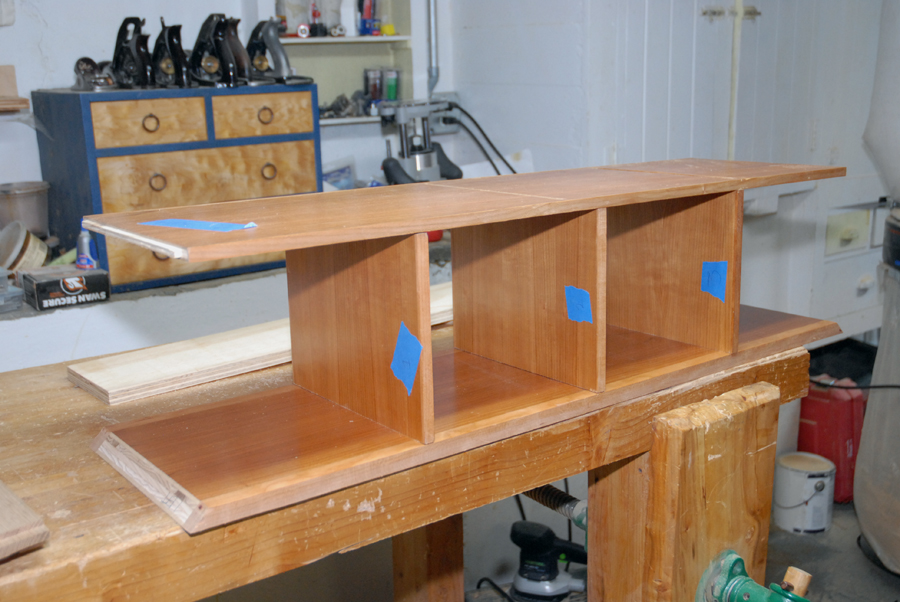
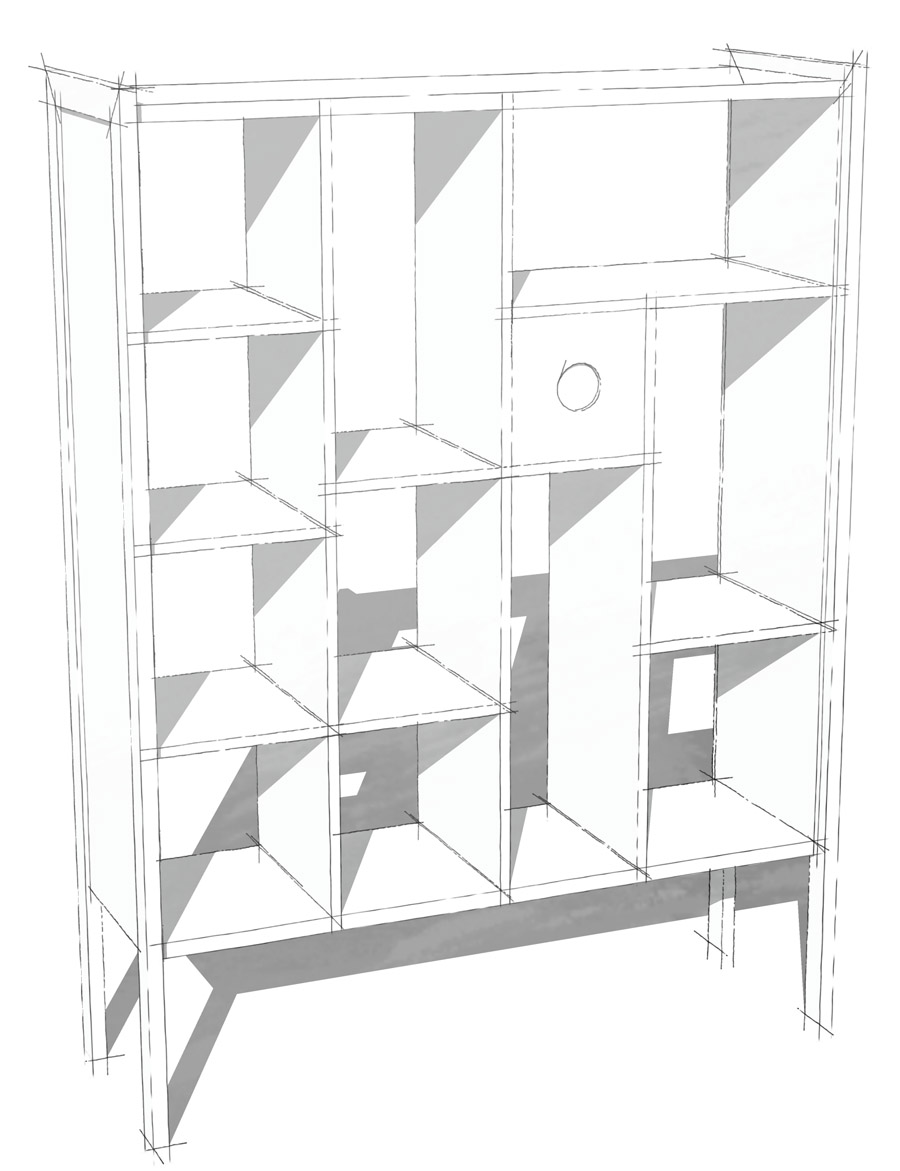
Aside from the mitered case sides, construction was pretty straight forward. Mortise and tenons join the base, which is then coved, and dadoes house the dividers. To cut the miters, I used a large chamfer bit and clamped a fence to the edge of the board to guide the bearing–a simple setup that let me bring the tool to some large pieces of stock and also avoided fussing with a router table. I cut the miters in multiple passes, slowly easing into a finished cut. Sadly cutting the joints was the easy part; glue up proved a little more problematic. For such a large assembly, I couldn’t tape the edges and roll the case up after applying glue. Instead I glued the dividers to the case top and bottom, then glued one side at a time, clamping the side to a diver and using clamps to along the side to bring the miter together. After considering options for base attachment, I drilled some pocket holes in the aprons and screwed the base to the case. Shelf hole liners finish the raw shelf pin holes.

Garden Fountain–Construction

basalt fountain

A basalt column fountain installed in the back yard.

Conceptually, a fountain installation is not a difficult project. A waterproof basin houses a pump which recirculates water through a vessel. As is often the case, execution proved more difficult than the concept might suggest. It was easy enough to source the basalt column, and Morrison Gravel drilled it. Both Home Depot and Lowes minimal pond departments had pumps and plumbing, but a small basin and support proved more elusive. After much searching, I found a basin much like this one for a price that was too good to refuse. Following the suggestions I read in Amazon reviews, I cut ABS pipe to length to provide a support column for basalt and caulked the seam of the basin lid to seal it. I then dug a hole for the basin, set the pipe in place, covered the basin, placed the pump inside, and plumbed the column. Some decorative stone covered the basin lid, and after plugging the pump in, I had a working fountain. Continue reading

Mogensen-Inspired Console Bookcase

Mogensen bookcase

Mogensen’s piece features a case-on-stand design and subtle interplay of varying dimensions.

My friends admired a bookcase by the Danish designer Børge Mogensen–and rightfully so: the stand-on-case design features a subtle interplay of details–between the case and top, between the varying thickness of stock, and between the shelf and case depth–that distinguish the piece. Unfortunately, the second floor of their one-and-a-half-story Craftsman bungalow couldn’t accommodate the case’s 63″ height. Clearly a shorter case was needed, but simply eliminating a couple of shelves while preserving the width of the original would create an ungainly design, an ill-proportioned stumpy case. Continue reading

Finn Juhl-inspired Coffee Table–Construction


Detail of a Finn Juhl coffee table

Suspended by six steel pegs, the top appears to float on this Finn Juhl coffee table.

Construction began with the top. I cut a 3/4″ plywood panel 1/4″ undersized to account for the 1/8″ edge banding with my tracksaw set at angle to cut the bevel. After ripping stock into 1/8″ strips, I spread a bead of glue along the short plywood edges and gave it a minute to size the join, then applied another thin bead of glue and taped the banding in place with painter’s tape. When the glue dried, I trimmed the banding and then banded the long sides. While the glue dried, I cut the pattern for the legs and shaped it to final size, then roughed out leg blanks and routed them to final size. I’m glad I cut extra blanks since I destroyed several while trying to rout the curve of the stub out–the short grain is prone to blowout. Continue reading