Author Archives: Michael

Basement Door

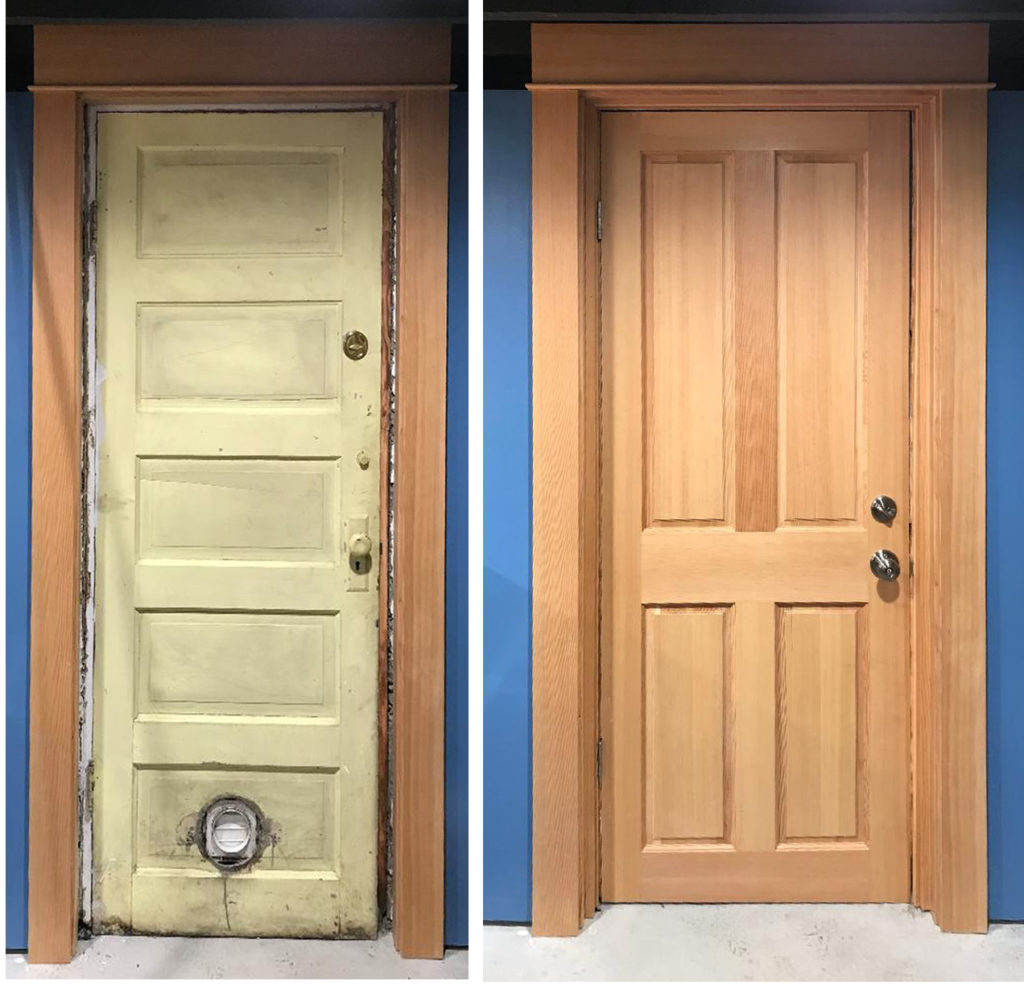
Before and after replacing an old basement door.
After a hundred years of abuse and neglect, it was time for a new door. The salvaged fir door in a clear finish matches the front door of the house.

As our laundry room took shape, the old basement door stood out, it’s faded, haphazard paint, split panels and cutout for a defunct dryer vent contrasting sharply with fresh paint and new trim and cabinets.

I’d entertained the idea of installing a glazed door of some sort to let more light into the basement, but shockingly prices took me to the local architectural salvage yard. An hour spent in a freezing warehouse yielded a new door in fir (coincidentally matching our front door) in roughly the right size.

To bring the door to final size, I ripped and cross cut it with a tracksaw. Rather than try to fit the not-quite-square opening, I cut the door to the smallest of three measurements I took for height and width. Tbe results might not look as polished as cutting and planing to a perfect reveal, but the door fit in the opening with no fine tuning. After a light sanding with 220 grit to clean up the door, I vacuumed it clean and wiped on three coats of satin Polycrylic.

Having removed the pre-cut hinge mortises when I trimmed the door to final width, I had to cut new mortises. I transferred the hinge location to the door from the frame and laid out the new mortises, then used my trim router to rough out the joints before fine tuning with a chisel. I could then hang door and install hardware. The door had been pre-drilled for a lockset, but I had to drill another series of holes for the deadbolt, a task greatly simplified by a jig. After transferring the latch locations to the door frame by rubbing a pencil along the latches and shutting the door, I marked and cut the mortises for the latch plates.

A Rustic Armchair

rustic chair

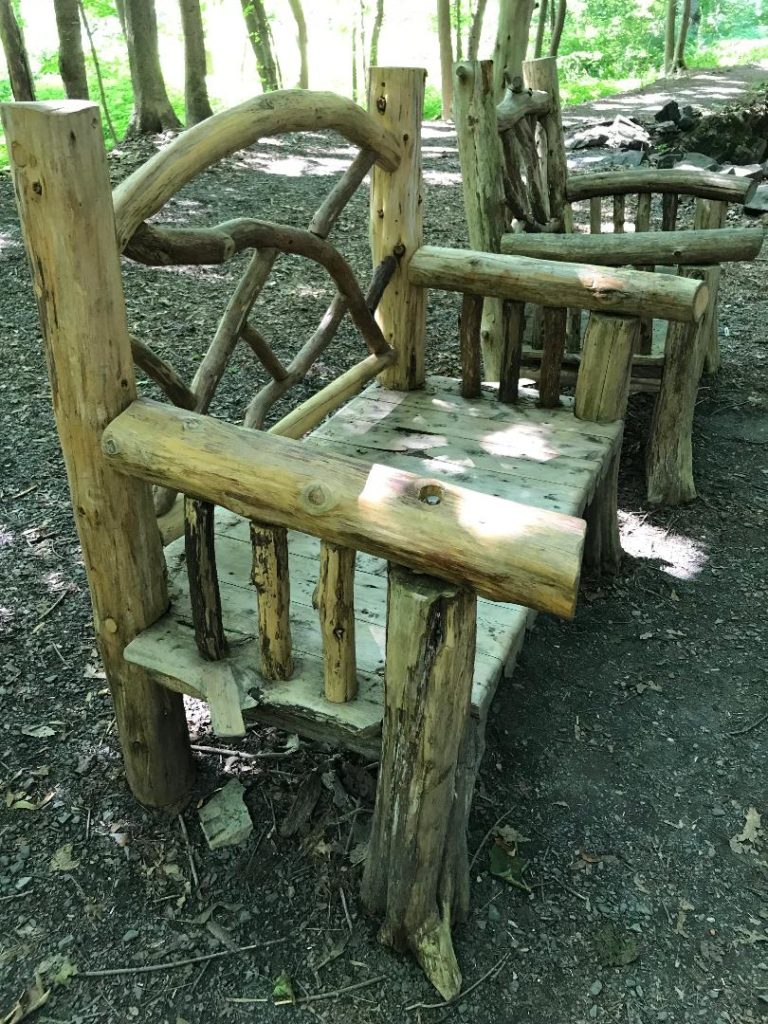
A rustic arm chair for the outdoors at Falling Waters Preserve.

Falling Waters Preserve sits on the Hudson a couple of hours north of New York City in Glasco. The site of a now vanished ice house (where works once harvested tons of Hudson river ice during the winter), the park now features easy hiking trails and scenic views of the Hudson.I spotted this rustic arm chair by the side of the trail positioned to take in a view of a waterfall. With its minimally-worked wood, it reminds me of Old Hickory furniture. I’m not sure how well the exposed screws and through bolts will hold up, but it makes an interesting alternative to other outdoor forms like the Adirondack chair, and you might be able to source materials on a woodpile.

Japanese Writing Box featured in the June 2019 Popular Woodworking

June 2019 Popular Woodworking cover

My article on building a Japanese Writing Box is featured in the June 2019 issue of Popular Woodworking

I’m excited to see my article on building a Japanese writing box in the June 2019 issue of Popular Woodworking. Despite it’s small size, the project offers the chance to practice a variety of joinery and offers an attractive variation on rabbeted joinery, elevating a utilitarian joint.

PermaDry Waterproofing Installs a Perimeter Drain

perimeter drain installation

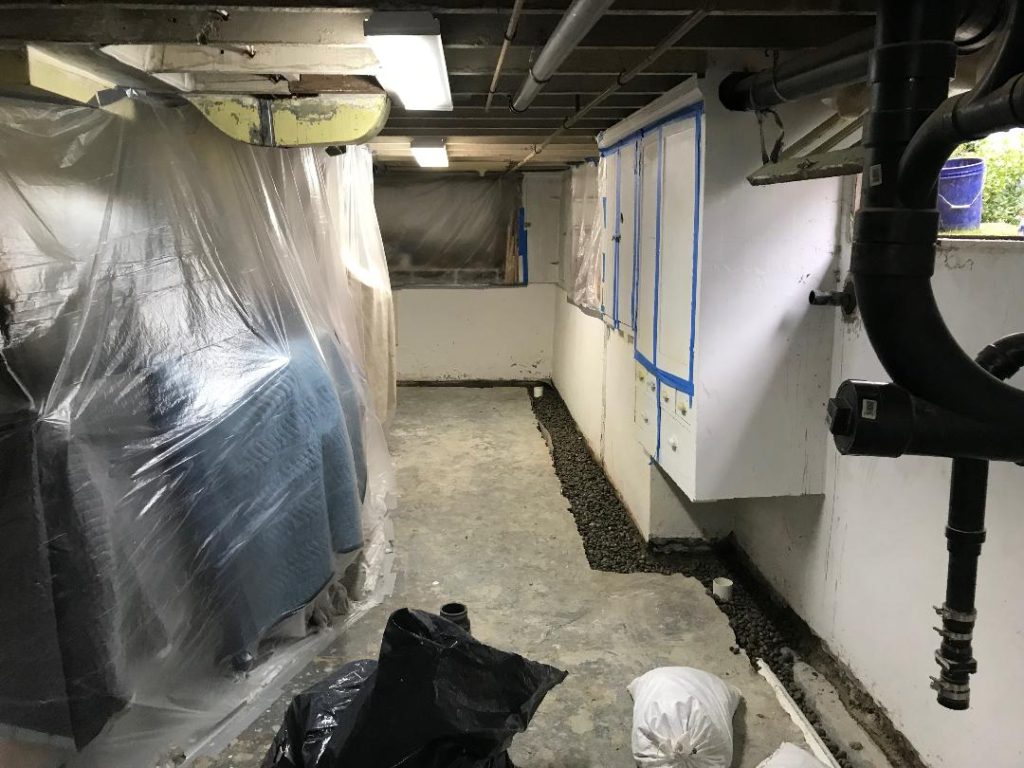
Contractors cut a trench in the basement floor to install a perimeter drain and sump pump.

Like most older homes in our area, ours suffers from water intrusion in heavy rain, with water running across the floor to a sump previous owners had installed. It was tolerable, if annoying, when we used the basement for laundry, storage, and shop space, but it was a problem we needed to solve if we were going to renovate with an eye to adding living space. I briefly considered installing a perimeter drain myself following the instructions on familyhandyman.com, but the thought of moving tons of earth and concrete didn’t appeal. After reviewing bids from a couple of local companies, we selected PermaDry Waterproofing. While they were slightly higher than other bids, I appreciated their materials choice (perforated PVC over corrugated polyethylene) and design. After some government-shutdown-induced rescheduling, PermaDry brought in two crews to install an interior perimeter drain and sump pump in a single day. Continue reading

Shaker Side Table–Construction

Shaker side table built in maple.

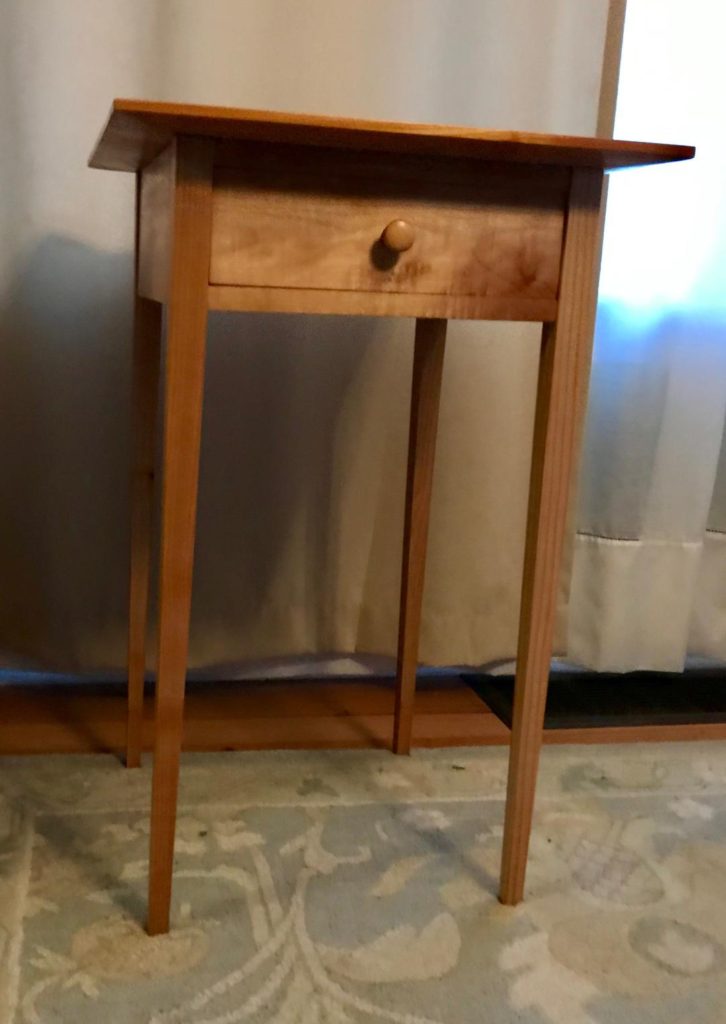
The Shaker side table rendered in soft maple.

Anticipating a basement waterproofing operation in the near future, I spent time late last year trying to clear up and clean out the basement. That work included reducing my wood stash. I was getting ready to throw out some soft maple (victim of an aborted credenza project from almost a decade ago) when I realized I had enough material in the right thicknesses to build one of my favorite designs, a square Shaker side table featured in Thomas Moser’s How to Build Shaker Furniture.

I first built the table in 2006, closely following Christopher Schwarz’s article in the Autumn 2004 issue of Woodworking Magazine. For the more recent version, I referred to Moser’s measured drawings and took my own approach. I glued up the top and squared it on the table saw, then marked the wide bevels before planing them by hand. I’ve cut these before on the tablesaw, but roughing them out with a jack plane then finishing with a smoother isn’t much slower than roughing them out on the saw and feels safer. The legs were roughed out on the band saw (much easier than using a jigsaw as I had in 2006), then finished with a jointer plane. The legs are joined to the wide aprons using Dominoes. I appreciated the ease of effort the Dominoes allowed when I chopped the dovetail socket and mortises for the narrow aprons framing the drawer. Handcut (they’re not pretty, especially with the soft maple prone to blow out on the tails) dovetails join the drawer, with a plywood bottom rabbeted into the bottom. I glued drawer guides into the side aprons, then drilled the upper guides to screw the base to the top.

Before joining top and base, I sanded them separately and wiped on several coats of boiled linseed oil. After the top was attached, I applied a coat of paste wax.

More Information

  • Thomas Moser’s How to Build Shaker Furniture includes measured drawings for the side table. Christian Becksvoort’s drawings give the second edition a particular charm, but the revised third edition includes some additional designs and better photography.
  • The late, great Woodworking Magazine featured an article on building the table in the Autumn 2004 issue. The article has been posted to popularwoodworking.com free of charge.
  • If you prefer biscuit joinery to mortise-and-tenon, American Woodworker’s take is worth a look. It’s also available for free on popularwoodworking.com.


Shaker Side Table–Design

shaker side table

Elegant in its simplicity, this Shaker side table is perfect for the side of a bed or sofa. Image from the Autumn 2004 issue of Woodworking Magazine, available on popularwoodworking.com.

I first encountered Thos. Moser’s interpretation of a Shaker side table in the second edition of his How to Build Shaker Furniture in 1999. At the time I wasn’t equipped to build it (I had just started building simple pieces with jigsaw, circular saw, and drill, working on a flat roof or kitchen that could be easily swept out after building), but could still admire the graceful taper of the legs and and the beveled top. The table’s design makes it perfect for the side of a bed or couch, the embodiment of Shaker simplicity captured in the compact package. Continue reading

Pumpkin Carving Tools

pumking carving tools

Pumpkin carving arsenal

I thought it might be helpful to identify the tools I’ve found helpful carving jack-o-lanterns. While we abused various kitchen knives growing up, specialist tools can make carving safer and simpler while sparing your good knives. From left to right and back to front in the image above:

  • Rubbing alcohol: clean Sharpie ink from pumpkin skin.
  • Sharpie permanent markers: mark up a pumpkin for carving.
  • Utility knife (or X-acto): cut pumpkins precisely.
  • Serrated carving tool: primary tool for removing sections of pumpkin (though I’ve been tempted to use a jigsaw for large removal). Often available at the grocery store around Halloween.
  • Carving gouges: carve the pumpkin. I bought this set of carving tools years ago and have used them more for carving pumpkins than wood. The gouges of various widths and shapes are useful for carving lines pf varying weights into a pumpkin or removing skin to allow light to shine through.

Paint Shaver Pro

Shaved siding

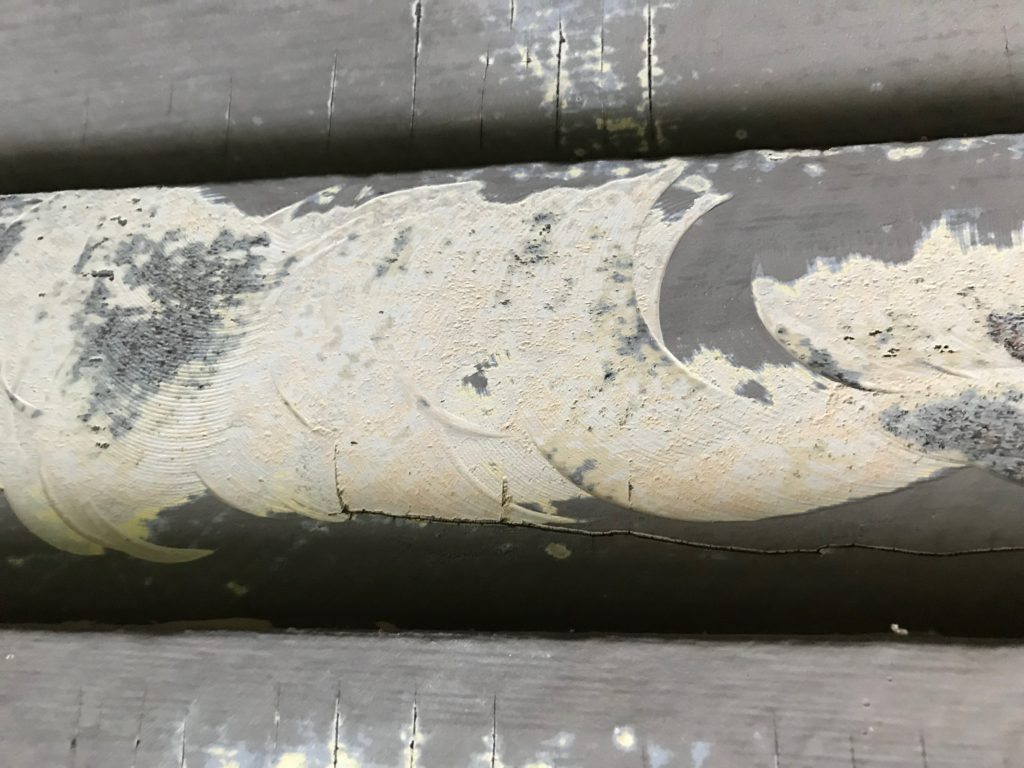
The Makita Paint Shaver Pro removes paint quickly from flat surfaces but has the potential to gouge material.

I spent a fair amount of time this summer stripping the front of the house to prepare it for painting using a variety of techniques, including chemical strippers and infrared heat. When I mentioned the project to a co-worker, he offered to lend me Makita’s Paint Shaver Pro. I gladly accepted the offer. The Paint Shaver Pro is an angle grinder with a carbide cutting head that grinds paint (and wood if you’re not careful) as you move it across a surface. Paint removal with the tool is fast, especially compared to other stripping methods, but that speed comes at a cost. Continue reading