

This partial pattern contains all the elements of the case sides without the bulk entailed by a full-sized pattern. It also allows the creation of sides of different heights.
Building the No. 367 is straightforward proposition. Dadoes capture the shelf ends and join the case together while the gallery back helps things square. I made a few modifications to the design, altering the depth from 12″ to 11.25″ to use 1″ x 12″ material, and narrowing the case from 30″ to 24″ since I thought it looked better. I also substituted a shiplapped back for the original’s panel. Having decided on a milk painted finish, I chose pine instead of the fumed white oak used in the original.
I began by preparing a pattern for the cutouts, radiused corner, and legs. Instead of a full-sized pattern, I used a partial pattern, which allows me to re-create the sides at different height if I want to make the case taller or shorter in the future. After cutting the sides to length, I traced the cutouts and roughed them out with a drill and jigsaw, then affixed the pattern to the sides with double-sided carpet tape and shaped the cutouts and radiused corner at the top. To cut the feet, I repositioned the pattern, roughed out the cut with the jigsaw and finished with a pattern bit in the router. The 3/4″ dadoes for the shelves were cut with a router guided by a jig. After rabbeting the sides for the gallery back and shiplapped back, I set them aside.
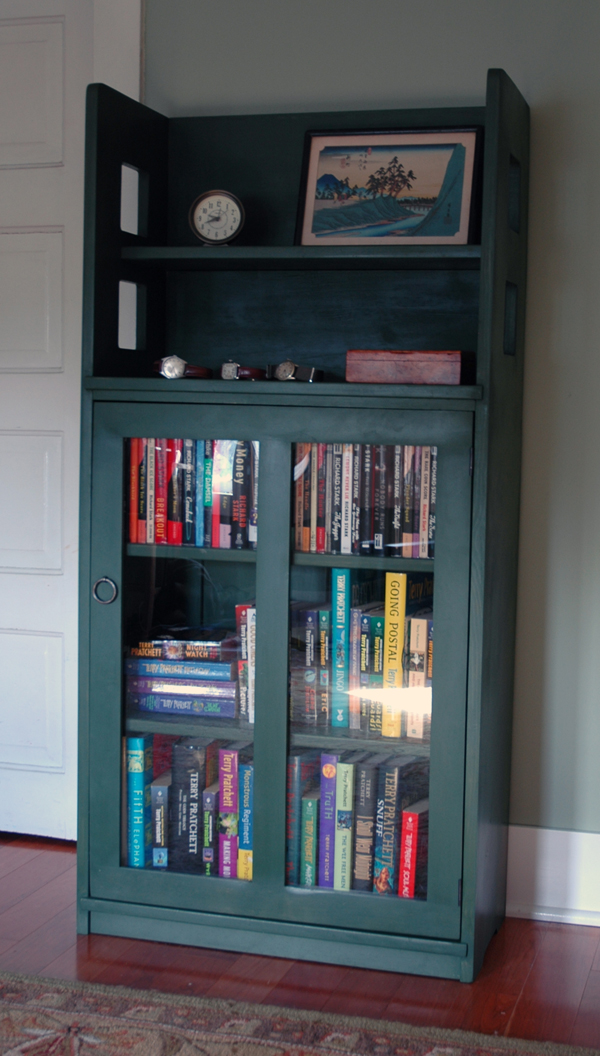
Variation on the No. 367 bookshelf.
I crosscut and ripped the shelves and gallery back to size, then rounded over the front edges of the shelves using a 1/8″ roundover bit, stopping the cut 3/8″ from either end on the gallery shelf. Since the full shelves stand slightly proud of the case, the roundover can run the whole length of the shelves. With the shelves and sides cut, I dry-fit the case and glued it up.
While the case dried, I planed the back boards to 1/2 thickness, cut them to size, and rabbeted the sides. A single screw at the top and bottom edge of each board holds them into their rabbet.
The door is a simple frame of 2″ wide members cut to length and joined using loose tenons. After assembly, I cut a 1/4″ by 1/4″ rabbet for the polycarbonate panels. The panels are held in place with glazier points, and the door hung from morticeless hinges.
After sanding everything through 220, I rolled on three or four coats of Lexington Green milk paint, lightly sanded to knock down any high spots, applied a coat of oil, then burnished with steel wool before applying a coat of dark paste wax.