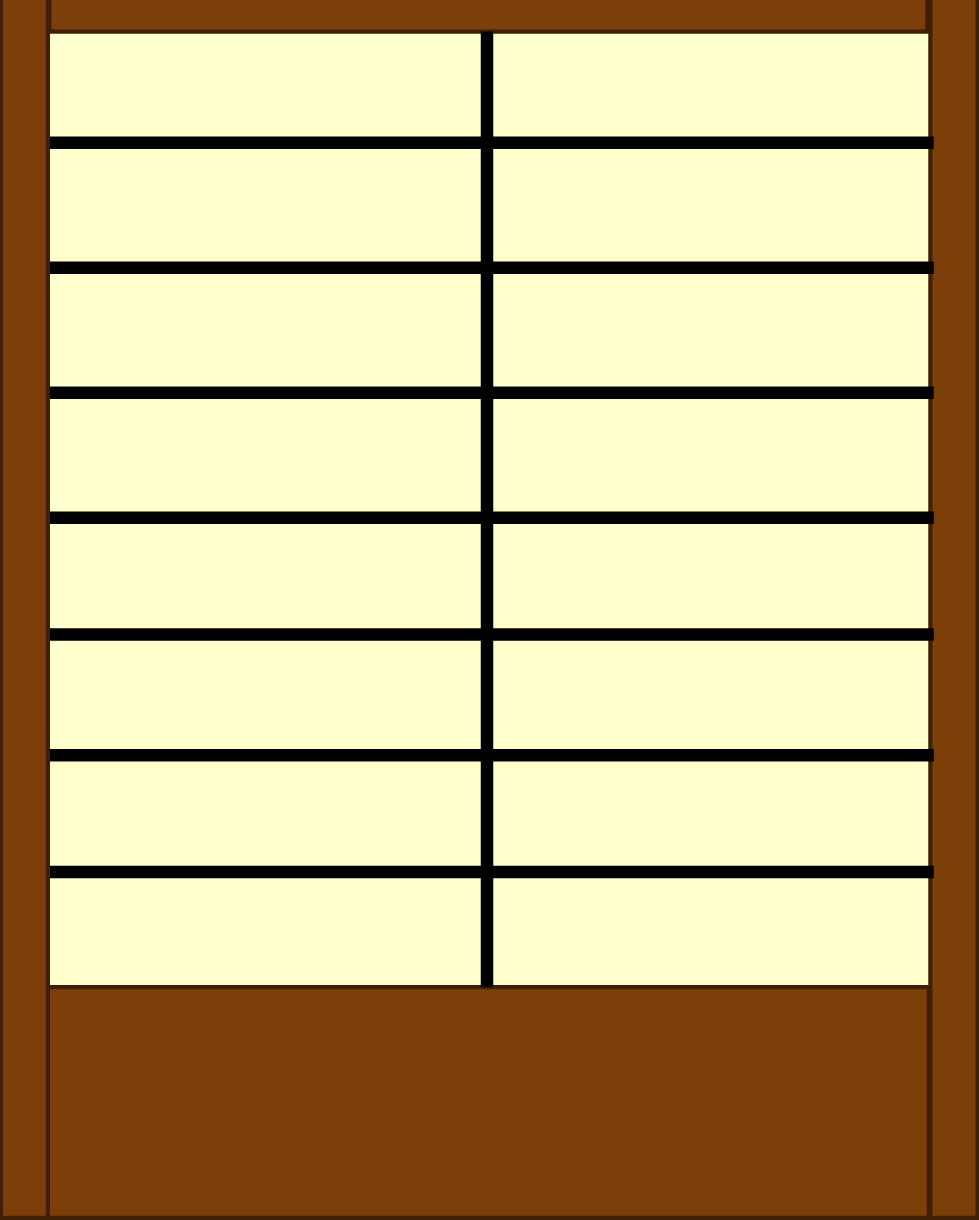
Straight cuts allow for plenty of design variation while allowing for easy construction. Here the choice of frame, color of glass, and thickness of came combine to suggest a shoji screen.
On the local Historical Society’s annual tour of homes, we admired the leaded glass paneled doors of a kitchen’s cabinets and decided to do something similar as part of the update to our kitchen. While
cutting and fitting curved pieces requires special equipment, the straight edges used here are easily assembled using only a few additions to common shop tools. Simple variations adapt the panels to a variety of styles, including Craftsman, Prairie, and Asian-inspired.
To build your own panels, you’ll need a glass cutter, straight edge, solder, came, a way to cut the came (I used a power miter saw, but a hacksaw will work), glass, putty, putty knife, and an assembly board, a large rectangle of MDF or plywood with two fences forming a right angle at one corner of the board. The panel is assembled from that corner outward, ensuring tight fitting joints and a square panel as glass and came are added to achieve the desired size. The panel is then soldered and puttied.
For the panel pictured below, I built up the panel one column at a time, placing a pane, cutting a short piece of came below the pane, then placing another pane. When the column is complete, I place a long strip of came along the edge, then assemble another column.

Using a T-square to guide the cutter (here a sliding square allows for repeatable cuts), run a glass cutter down the glass, pressing firmly to score the glass. Placed the scored line over the edge of the bench and press gently to break the glass along the line.

Position the first piece of glass in the corner formed by the two pieces of mitered U-channel came. Cut a piece of H-channel came to length along the bottom of the glass, leaving enough space for the vertical came. Continue placing glass and cutting came to fit.

Continue adding glass and came until the panel is complete.

Apply flux to the joints using an acid brush.

Position the solder over the joint and use the iron to melt it into the joint.

After soldering, the finished panel is puttied, cleaned and secured in its rabbet using glazier points or wood strips.