Monthly Archives: December 2015

Of Umbrella Stands and Table Bases

Lambert Umbrella stand

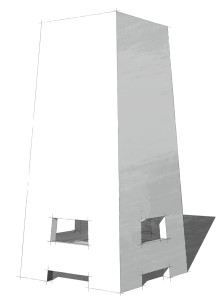
The base of the No. 239 tabouret reminds me of the No. 254 umbrella stand.

I’d leaned the sides of the tabouret against the bench to get them out of the way to begin work on the corbels when something in their shape seemed familiar. Because the Limbert Furniture Company produced so many designs featuring the tapered column base, it took me a minute to realize why these sides look familiar: They are very similar to the the shape of the No. 254 umbrella stand. The stand may have a slightly wider mouth than the table, but both share the same footprint and similar cutouts, though the tabouret features two cutouts the stand’s one. It would be easy to repurpose the template I created to build the umbrella stand, either preserving both cutouts or omitting the second. The umbrellas probably won’t mind if I’m not 100% accurate to the original.…


More Information

The No. 254 Umbrella Stand is one of thirty-three Limbert designs featured in my first book, Building Classic Arts & Crafts Furniture, available on Amazon and Shopwoodworking.com.

Holy @&*! You Can Epoxy Aluminum

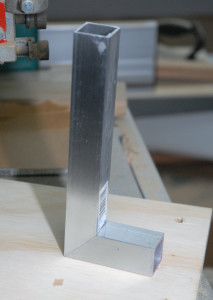
epoxied aluminum miter joint

I’d read in the past that you can use woodworking tools to mill soft metals like brass and aluminum, but I didn’t give that much thought. I also read you can bond metal using epoxy. Again, I didn’t give the fact much thought–until recently. Researching an upcoming project, I’ve finally had cause experiment with epoxy and aluminum tubing, and with my first results, my reaction has gone from “oh, you can epoxy aluminum” to something like “HOLY @#!$! YOU CAN EXPOXY ALUMINUM!” No need to braze or weld, you can just glue. Couple that capability with the ability to mill soft metals using woodworking tools, and it opens up new potential in the shop.

I’m still in the early stages of my experimentation, practicing simple and compound miter joints, but it’s a short step from experiment to fabricating parts. The base of a Nelson bench comes to mind, as does a variation on an Eames surfboard table.

To build the miter:

  1. Cut the aluminum tubing at the miter saw.
  2. Sand the miter with 50-80 grit paper. Scuffing the metal helps the epoxy adhere to it.
  3. Clean the metal with mineral spirits.
  4. Mix epoxy per the instructions. I used JB weld.
  5. Apply the epoxy yo the tubing and clamp together. I used a corner clamp for this miter, but for a trapezoidal frame (like the base of the Nelson bench, I’ll try packing tape.


More Information

  • Chest of Books has posted an electronic version of G. W. Birdsall’s Do It Yourself With Aluminum. It’s an older title, but has useful information on cutting, shaping, and joining aluminum.
  • The Nelson Bench is one of 29 projects featured in my Mid-Century Modern Furniture.