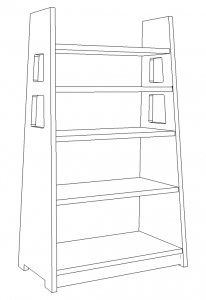
The cutouts and sloping sides of Limbert’s No. 346 Magazine stand distinguish it from more pedestrian offerings from other makers.


The cutouts and sloping sides of Limbert’s No. 346 Magazine stand distinguish it from more pedestrian offerings from other makers.
When the time came to replace the utilitarian shelves in my office, I knew I wanted something in the Arts & Crafts style, but the sloping ceiling and short knee walls create some design constraints, and I needed a design that lent itself to production techniques. After checking my library for options, I decided one variation or another of the magazine stand would match my design and construction requirements.
Initially drawn to the trapezoidal forms produced by the Charles Limbert Company, I prototyped a couple. While they add some visual interest, the tapering sides required cutting three different shelves for each stand, complicating construction. After some experimentation, I settled on a modified version of Stickley’s No. 79. This iteration of the form features rectangular sides softened by radiused corners on the top edge, a half-moon cutout to form the handle, and an arch on the bottom edge. A router template would make reproducing the sides relatively easy, and the straight edges of the sides meant that I could cut the shelves without having to change any tool setups.
I modified the design to better fit the space and my requirements. I reduced the height from 40
inches to 36, lowered the bottom shelf to increase storage capacity, and increased the radius on the top corners. I also added a couple of inches to the width of the shelves and eliminated the toekick. With the design finalized, I prepared a full-sized router template in 3/4″ plywood.
Since I had a lot of shelves to build, I chose #3 pine. It’s readily available in wide boards and economical. The blanks were cut to slightly oversized on the tablesaw, then attached to the template. Had I been placing all the shelves in the same position for each stand, I could have screwed the template into each side so that the shelves would have hidden those screw holes. But I needed to be able to adjust the height of the shelves, so I used double-sided tape to attach the template to the blanks, then roughed out the shape of sides using the jigsaw and trimmed to final dimensions with a flush-cutting bit in the router.
When I can, I like to pre-finish my projects before assembly. It can increase the time spent on finishing, but it simplifies the process. After sanding through 220 grit, I wiped on three or four coats of amber shellac. Once the shellac was dry, I wet sanded with 400 grit. Joinery is simple: two pocket hole screws in the end of each shelf join the stand together.